DKIM (Domain Key Identified Mail) is used to detect email spoofing. The recipient validates the signature against the public key registered on the DNS for the sender.
To enable DKIM on Office 365, access your portal and go to the exchange admin center.
On the main screen, select “dkim”, and then select the domain you want to work on. On the right, if dkim is not enabled, you will see the following:
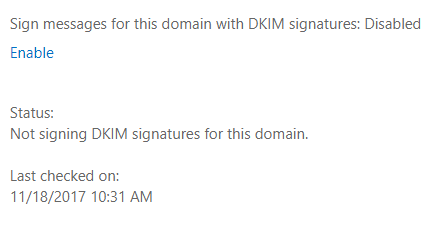
Click ‘enable’ and copy the values that the tool is complaining:
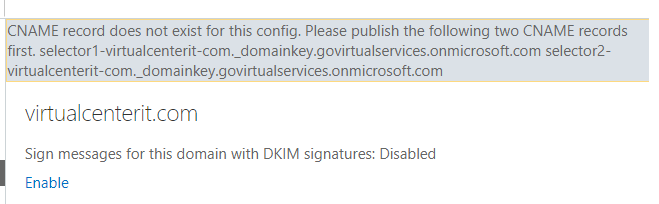
For Office 365, we need to use two selectors on our DNS. In this example I’ll be using a secondary domain named ‘virtualcenterit.com’
Create two CNAME entries with the data we have now:
selector1._domainkey.virtualcenterit.com ----->  selector1-virtualcenterit-com._domainkey.govirtualservices.onmicrosoft.com
selector2._domainkey.virtualcenterit.com ----->  selector1-virtualcenterit-com._domainkey.govirtualservices.onmicrosoft.com
Once they are replicated, enable the DKIM again.
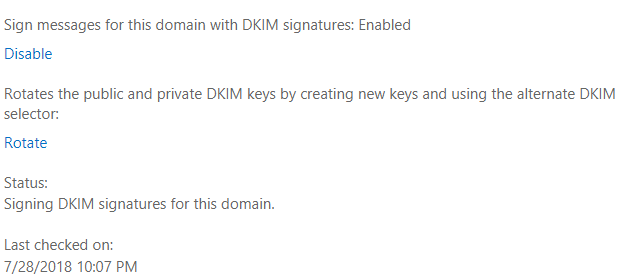
From here you can rotate your keys too if needed.